Mouse proof the rear cabin pressure release vents
Mice got into the cab of our truck through the rear cabin pressure release vents. These vents are easy for a mouse to push through (no chewing required), and they're reachable directly from the outside. Covering them with hardware cloth closes off the entry point.
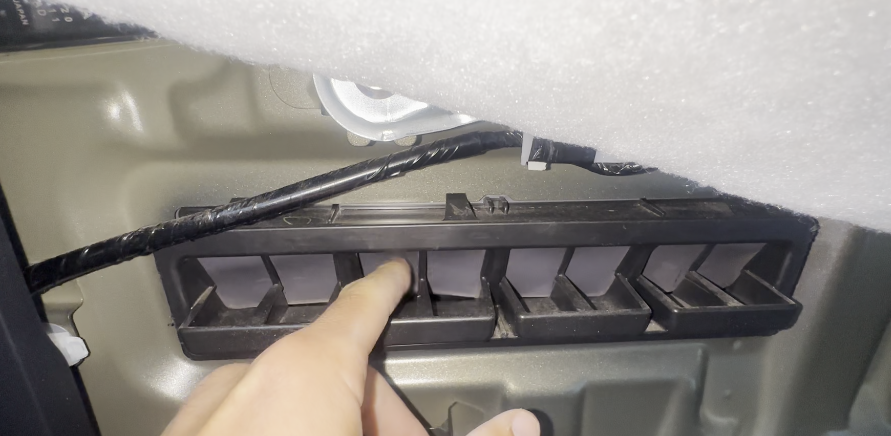
There are two vents, one on each side of the rear cabin wall. Repeat the process on both.
Parts
- 1/4" hardware cloth
- 14" zip ties (4 per vent, so 8 total)
Tools
- Tin snips or heavy wire cutters (for the hardware cloth)
- Socket set (for the three bolts on the rear trim)
Video
Part 1: Remove the trim to reach the vents
- Remove the rear seats. See this video.
- Unclip the floor edge board. Pull up on it from all sides until it unclips. Repeat on the other side.
- Remove the two trim pins. Push down on the center of each pin with any tool, then pull it out. Repeat on the other side.
- Remove the under-seat side trim piece. Pull up on the front portion, then pull the piece out toward the front of the truck. Repeat on the other side.
- Remove the three bolts on the rear trim.
- Remove the rear trim. The push clips are mostly along the top, so start at the upper edges and slowly pull until they unclip on both sides, then remove the whole piece.
- Move the sound proofing aside to expose the vents.
Part 2: Install the mesh
Cut and shape the mesh
- Cut a piece of hardware cloth that is 49 by 17 squares.
- Bend and trim the corners so the mesh wraps around the vent like a box. I bent:
- 3 squares along the top and sides
- 5 squares along the bottom
Secure the mesh
Use 4 zip ties per vent:
- Run one zip tie along the top and one along the bottom, weaving each under the plastic retaining clips of the vent. This is a little tricky, but once the zip ties are through, they hold securely.
- Run a separate zip tie along each side, connecting the top and bottom zip ties.
- Trim the excess zip tie tails.
Repeat for the second vent.
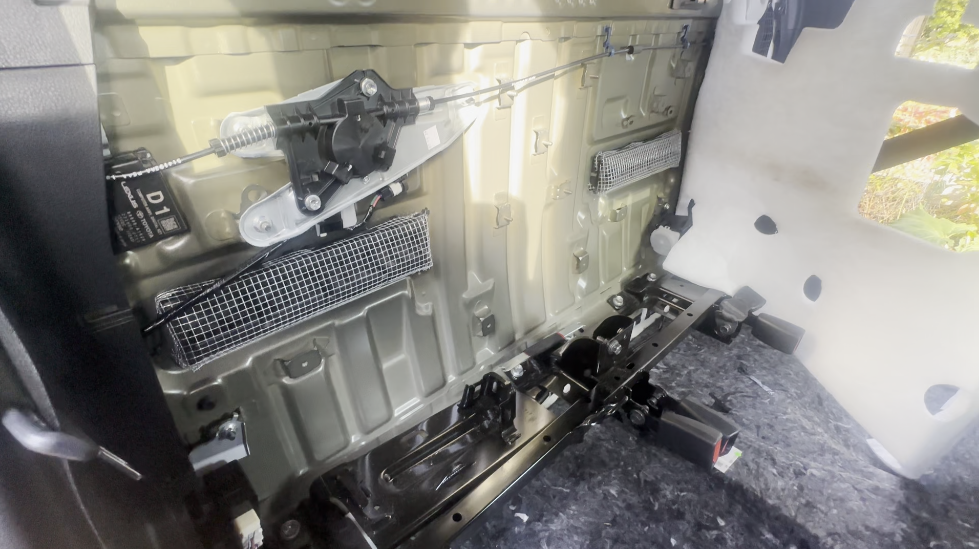
Part 3: Reassemble
Reinstall everything in reverse order: sound proofing, rear trim (clips and three bolts), under-seat side trim, trim pins, floor edge board, and rear seats.